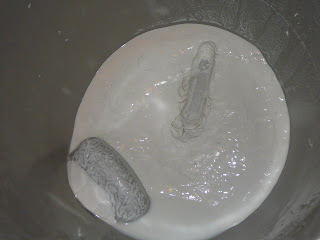
This shows just a tiny tasting of my recent days. The first picture shows the two inches of plaster/type substance that came off my hall walls by just washing before priming.
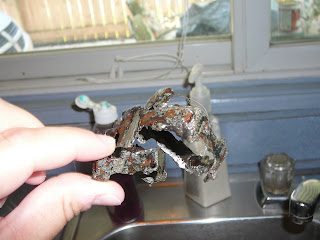
The second picture is something I removed from my garbage disposal after turning it on and then after it ran for 10 seconds started making a grinding horrible noise. I am going out on a limb and guessing that this is part of the chopping thing that should go around and chop all the gunk you put in a disposal?
And my final picture is the difference between my freshly painted living room ceiling and my unpainted kitchen ceiling.
Now of course I don't have pictures to showcase all the other issues that comes along with doing any kind of sprucing up in my wonderful fabulous home.
There was the issue of fixing all the cracks in the walls. Painting the hall way and the next morning starting to apply the top color to do the combing technique I was going to do to only have the bottom paint start peeling off. So of course I only had one choice. I spend all day yesterday re-texturing the entire living room. Yes it was fun. In fact it was the most fun I have ever had in my entire life. ........ can you feel the sarcasm?
In case you were wondering how to duplicate this in your own home, let me tell you!! First you start with a 4.5 gallon bucket of tuna smelling goo. I think it must weigh about 75 lbs. Then you add 2 liters of water. Apparently this is an important step. Then you can add a little more water. You want it to have the consistency of melted ice cream per directions on the back of giant bucket. NOW the tricky part is figuring out how to stir the water in to the giant goo bucket.... I found disassembling my swiffer and using long handle to work for me but I am sure others have come up with some other useful tools.
OK so your goo is stirred up and your swiffer stick is bent and your arm is hanging limp at your side because you stirred it to death. (it is now 80 lbs of goo keep in mind and you had to stab it quite a bit to *stir*)
The next step is take a 4 inch paint brush and apply goo to wall. NOW HERE is another important step it says apply thickly to about 1/16 to 1/8 inch thick. !!!!!!!( don't make the mistake I made. Apparently you really should drag out a ruler and measure your thickness IF you do as I do and go.....hmm its holding the brush horizontal to the wall so yep looks thick to me is bad. ) Now after you smashed on your 1/16- to 1/8 inch goo you take a roller with wonderful pattern of your choice and play in goo.
From time to time you have to rub goo off roller or was. Too much gunked up goo is bad. You also have to do opposite walls which means you have to drag your drop cloths, ladders, rags, and children ( I did mention that for the best possible results you must involve your young wonderful children who never argue, fight, shove each other in the goo into helping you right?? If I didn't that to is an important step to the proper goo application. ) OK so you have now applied 150 lbs of goo to your walls and it only took you 7 hours to do 3 walls. Good job time to take a pee break.
Now while you take your break you notice that your wonderful goo job (I used a roller to install cracks into my walls) is cracking. ** Now, I don't mean that my goo successfully has roller installed cracks, no that would be nice wouldn't it. OOOOH no not for us goo installers. Nope for us that means that our goo was applied to thick (refer to upper reference to 1/16 inch to 1/8 inch thickness) so our installed cracks has cracks. Talk about crack house from hell. But for those of us who don't feel the need to measure our goo, good news there is a way to fix this problem. The next morning when you roll out of bed and every muscle is on fire and you ache in places that you didn't know you had, you get more goo and add lots of water. Make it thin like paint....... I chose to go for the cheap thin brand of paint thickness (haha) and not the Lowe's variety of thickness.
Then you paint this thin paint like goo over the dried up crack goo. And ta-da you have kick ass crack textured walls!!!! Congratulations, good job I am so proud of you goo installers!!! You get a huge pat on the back and OK now you have to go trim out the hall because you left that project unfinished.
Ok sorry that was soo long and thanks if you got thru it. I just wanted to make sure if anyone ever needed to add goo to walls they knew how to do it. Think of it as your female friendly goo guide. or FFGG


1 comment:
OMG that post made my head hurt. I would never been able to get any of that done. Hope the painting is done soon.
Post a Comment